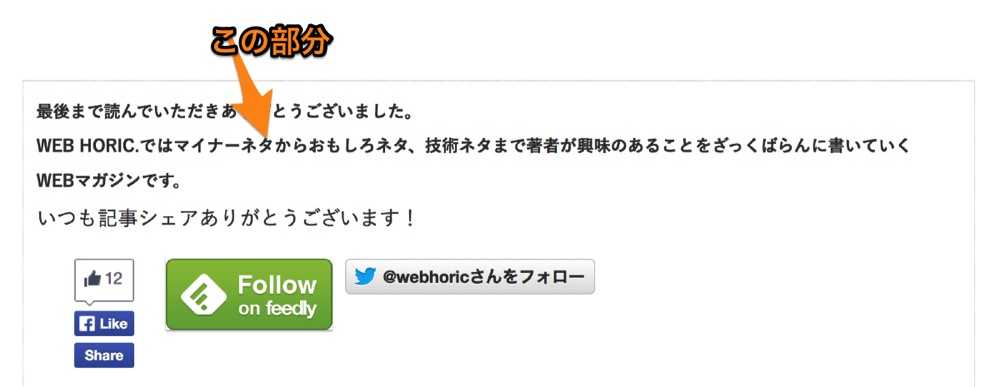
プロフィールシェアボタンを記事の下へ追加しました。
当サイトはWordPressで構築してあります。
JetPackやら他のプラグインやらを使えば、ささっと追加できますが、
一塊にしておきたかったのでhtmlを追加しました。
比較的読んでもらいやすい記事の下にソーシャルメディアへのシェアボタンを置く事は
ブログを作る上での必須項目になっています。
自分のブログファンを増やすきっかけにもなるはずですので、プロフィールシェアボタンを記事の下へ置きましょう!
今回設置にあたり使用したHtml,CSSはご自由にコピペしてもらってかまいません。
プロフィールURLやサイトのURLは必ず変更してください。
■シェアボタンの作り方
ほとんどのサイトでシェアボタンが作れるページが用意されています。
内容を入力してソースコードをコピペしたら終わりです。
はてなブックマークボタンの作成・設置について
Facebook Like Buttonページ
Twitter Buttonsページ
Google+ バッジ 作成ページ
feedlyボタンツール.
■関連
[W]Feedlyボタンをブログに設置する方法 | WEB HORIC.
Html
[html]
<div class="share-box">
<h5>適当なメッセージ </h5>
<div class="clearfix pad-15">
<!--FB like box -->
<div class="fb-like" style="float:left;margin:0 15px;" data-href="https://webhoric.com" data-width="300" data-layout="box_count" data-action="like" data-show-faces="true" data-share="true">
</div>
<div class="fl margin-lr10">
<!-- hatena -->
<a href="http://b.hatena.ne.jp/entry/https://webhoric.com" class="hatena-bookmark-button" data-hatena-bookmark-title="WEB HORIC." data-hatena-bookmark-layout="vertical-balloon" data-hatena-bookmark-lang="ja" title="このエントリーをはてなブックマークに追加"><img src="http://b.st-hatena.com/images/entry-button/button-only@2x.png" alt="このエントリーをはてなブックマークに追加" width="20" height="20" style="border: none;" /></a><script type="text/javascript" src="http://b.st-hatena.com/js/bookmark_button.js" charset="utf-8" async="async"></script>
</div>
<div class="fl margin-lr10">
<!-- Feedly -->
<a href='http://cloud.feedly.com/#subscription%2Ffeed%2Fhttp%3A%2F%2Fwebhoric.com%2Ffeed%2F' target='blank'><img id='feedlyFollow' src='http://s3.feedly.com/img/follows/feedly-follow-rectangle-volume-big_2x.png' alt='follow us in feedly' width='131' height='56'></a>
</div>
<div class="fl">
<!-- Twitter -->
<a href="https://twitter.com/webhoric" class="twitter-follow-button" data-show-count="false" data-lang="ja" data-size="large" data-dnt="true">@webhoricさんをフォロー</a>
<script>!function(d,s,id){var js,fjs=d.getElementsByTagName(s)[0],p=/^http:/.test(d.location)?'http':'https';if(!d.getElementById(id)){js=d.createElement(s);js.id=id;js.src=p+'://platform.twitter.com/widgets.js';fjs.parentNode.insertBefore(js,fjs);}}(document, 'script', 'twitter-wjs');</script>
</div>
</div><!--pad-15-->
<div class="pad-15">
<!-- Google+ -->
<div class="g-person" data-width="273" data-href="//plus.google.com/u/0/114697103077622764638" data-layout="landscape" data-rel="author"></div>
<div class="g-page" data-width="273" data-href="//plus.google.com/u/0/111075362616984196222" data-layout="landscape" data-rel="publisher"></div>
<!-- 最後の ウィジェット タグの後に次のタグを貼り付けてください。 -->
<script type="text/javascript">
window.___gcfg = {lang: 'ja'};
(function() {
var po = document.createElement('script'); po.type = 'text/javascript'; po.async = true;
po.src = 'https://apis.google.com/js/platform.js';
var s = document.getElementsByTagName('script')[0]; s.parentNode.insertBefore(po, s);
})();
</script>
</div><!--pad-15-->
</div><!--clearfix-->
[/html]
CSS
[css]
/*--------------------------------
share button
--------------------------------*/
.share-box{
border: 1px dotted #e1dbdb;
margin-bottom: 5px;
padding: 10px;
}
.fl{
float: left;
}
.pad-15{
padding:15px;
}
.margin-lr10{
margin: 0 10px;
}
/* clearfix */
.clearfix:after {
visibility: hidden;
display: block;
font-size: 0;
content: " ";
clear: both;
height: 0;
}
/* IE6 */
* html .clearfix {
zoom: 1;
}
/* IE7 */
*:first-child + html .clearfix {
zoom: 1;
}
/* DW */
.clearfix + * {
clear: both;
}
[/css]
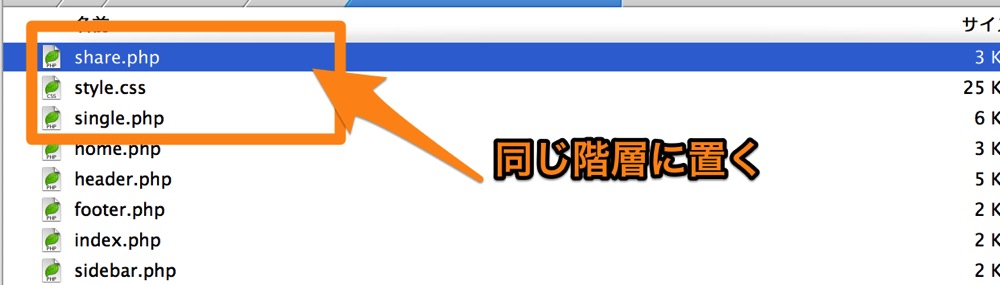
私の場合は後々、変更しやすいようにシェアボタンのhtmlをshare.phpとして1ファイルにし、
single.phpから下の一行を読み込むように処理しています。
[php]
<?php require_once('share.php'); ?>
[/php]